|
To make installation of your new USB LCD easier, we suggest that you do not plug the LCD in until the required USB drivers are installed.
|
Plugging the LCD in first will cause Windows to ask for drivers that you do not yet have creating complications. |
|
|
The drivers required to use a Crystalfontz USB LCD are located on the Crystalfontz website here. |
Once you have downloaded the USB drivers, install them to your directory of choice (the default directory is fine in most cases). |
Make a not of the directory you have installed the drivers in, as you will need this information later... |
|
|
Connecting your LCD to the computer is quite simple, only a USB cable supplied by Crystalfontz is required. |
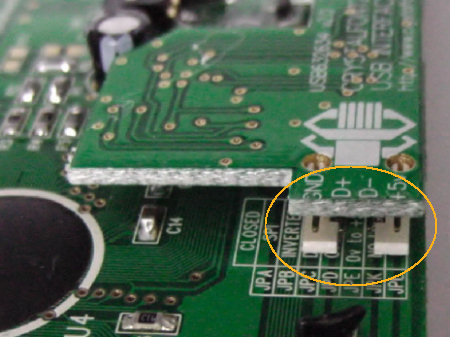
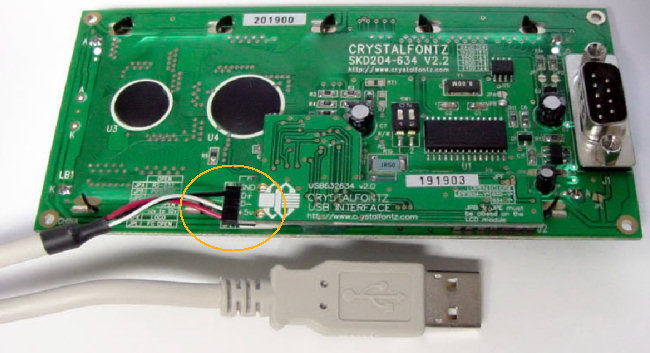
First, connect the USB cable to the back of the LCD module. |
The images below show where the cable should be connected on the 634/632 LCD modules: |
|
|
| |
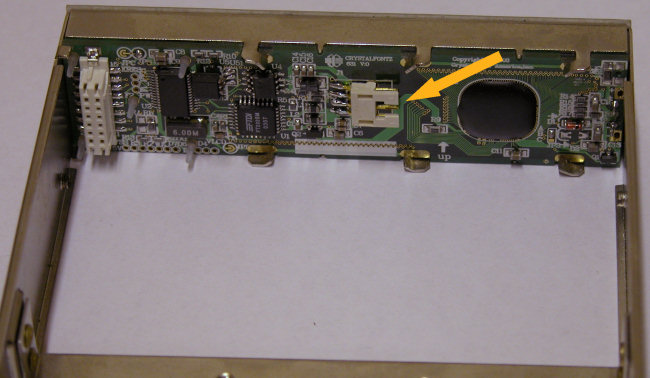
The image below show where the cable should be connected on the 631 LCD module:
|
|
| |
Be careful when handling the USB cable as the small connectors on the LCD can break if the cable is pulled away from the LCD while connected. |
Now simply plug the other end of the USB cable into an available USB port on the computer. |
Note: if a USB hub is to be used, make sure it is of the "powered" type, otherwise the LCD may not work. |
|
|
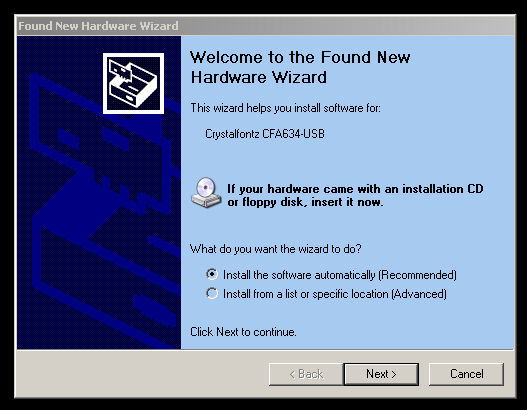
Once the LCD has been plugged in and the computer is turned on (if it wasn't already), Windows will detect the new LCD hardware which is indicated by a notice box popping up from the Start-Bar. |
A time after this notice box has appeared, Windows will display the below driver installation window: |
|
In this window select "Install from a list or specific location" and click in the "Next" button. |
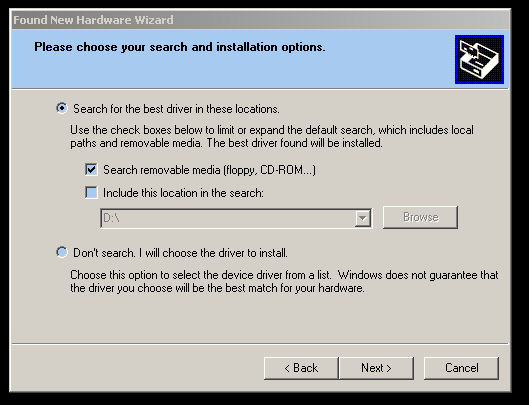
Windows will now ask you to locate the drivers for the LCD as shown below:
|
|
Un-tick the "search removable media" box, and tick the "include this location in the search" box. |
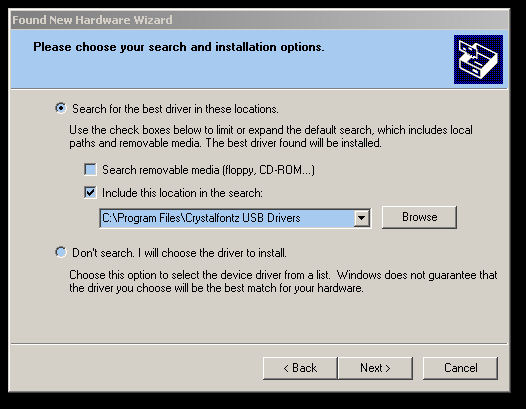
Then click the "Browse" button and select the directory that you installed the drivers to in Step-1 (normally "c:\program files\crystalfontz usb drivers") and click "Ok". |
This will return you back to the previous window like in the image below: |
|
| Click the "Next" button. |
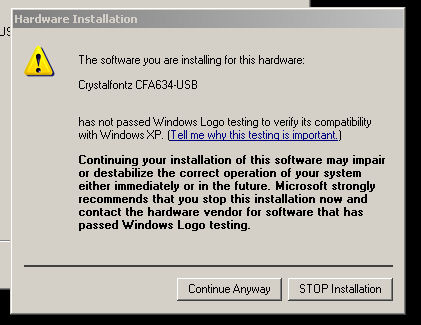
| Windows will now attempt to install the drivers. While doing so, you may be display the window below: |
|
| Click the "Continue Anyway" button to continue installation. |
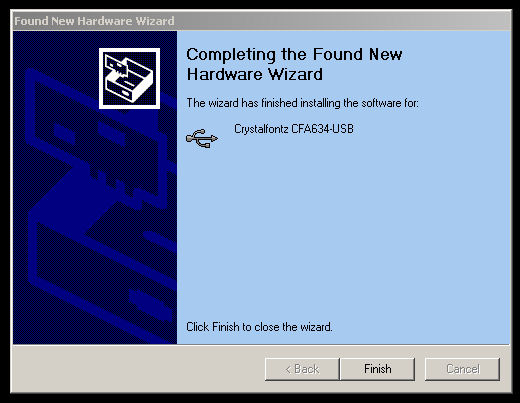
| When complete, you will be asked to finish the installation: |
|
Click the "Finish" button. |
After this, Windows will locate another new piece of hardware, the "USB Serial Port" device.
Go through exactly the same process again, specifying once again the location of the USB drivers. |
|
|
When the driver installation process in Step 3 is complete, your LCD should now be lit up and displaying the Crystalfontz greeting screen, or an empty screen with a flashing cursor. |
|
|