On the Level: Arduino and Displays
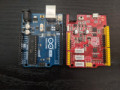
A Crystalfontz aficionado may notice that we sell and recommend an Arduino clone, the Seeed Studio Seeeduino, for use with many of our displays. The Seeeduino is a clone of the extremely popular Arduino Uno microcontroller. However, the Seeeduino offers one major advantage over the standard Arduino Uno; it can level shift its I/O lines to 3.3v.
Arduino users may cry “The Arduino has 3.3v output!” And indeed, it does. But only the single 3.3v power supply pin. When connecting a display to a microcontroller, each I/O pin must be 3.3v. Using the 3.3v power on the Arduino does not affect the voltage level on the I/O pins.
Using an Arduino Uno
This doesn’t mean the classic Arduino cannot be used with displays. There are essentially three options if you want to stick with the original Arduino as your microcontroller:
- Take your chances on frying your components and use them any way. Some may work. Some may work for a while and then burn out and leave you scratching your head as to why your system has suddenly failed. Use outside of the electrical characteristics described in the datasheet is not covered by our warranty.
- Use a display that is designed for 5v logic. There are plenty of 5v displays out there and Arduino has lots of libraries and tutorials for interfacing with these displays. You can use our advanced display search to find displays with a logic voltage of 5v.
- Do some external level shifting. This Hackaday post discusses some different options on how to level shift using voltage dividers or dedicated level shifting devices.
Changing Levels
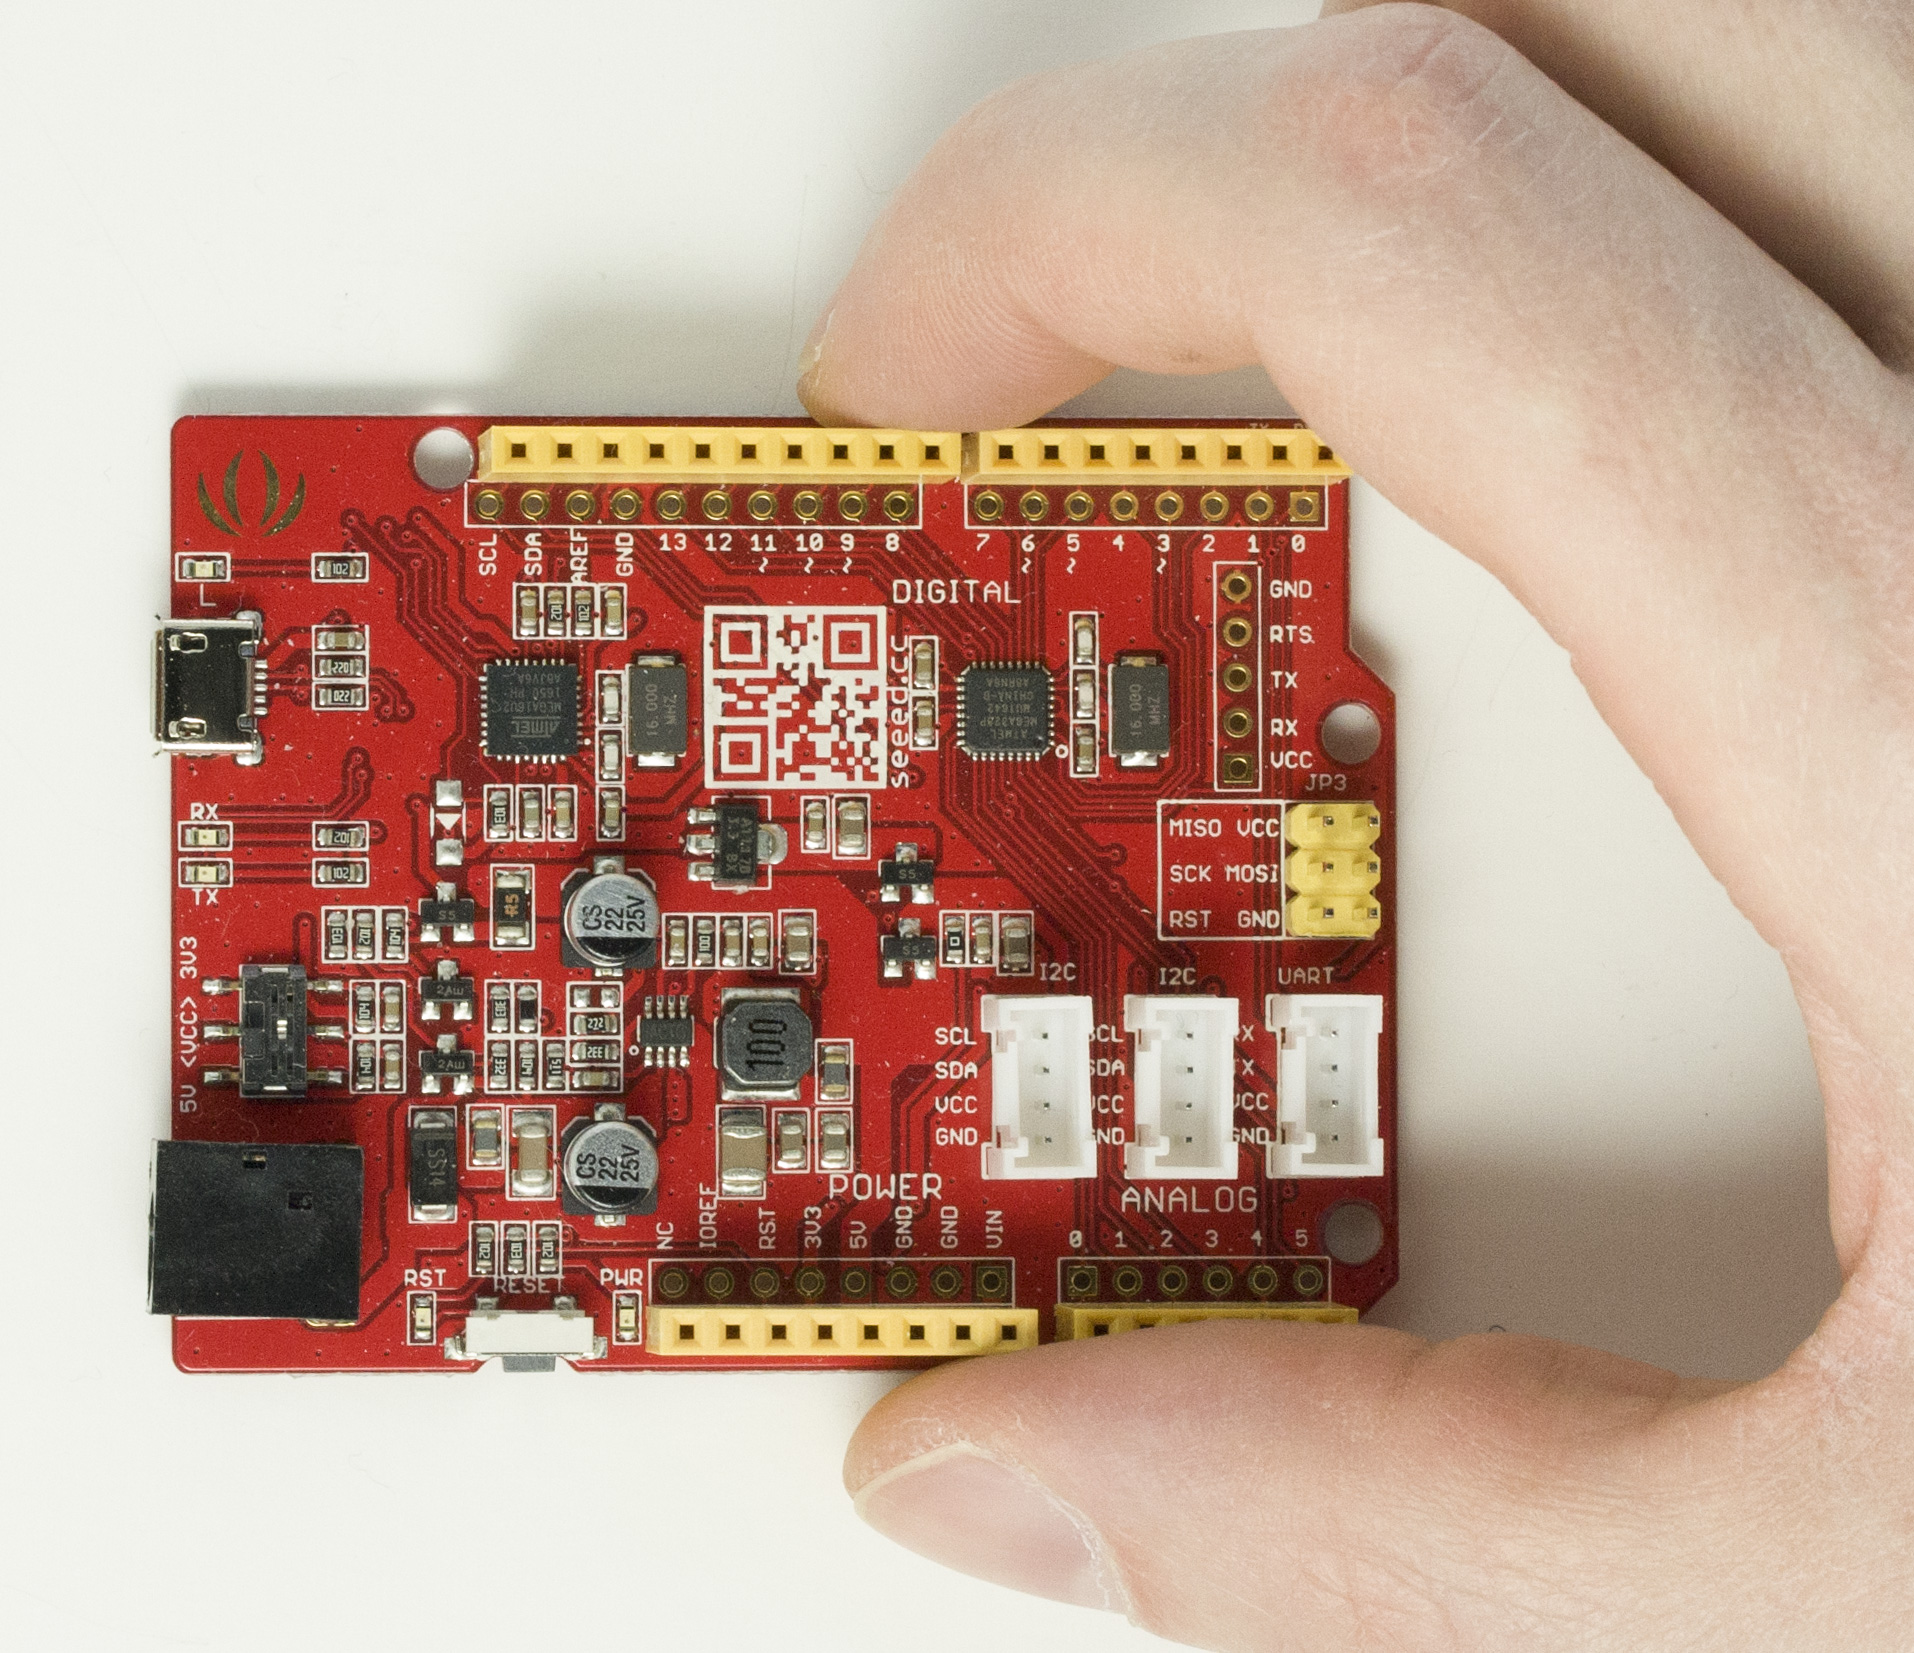
All of our TFTs and most of our other newer displays operate on 3.3v logic. Rather than level shifting each I/O line, which could be 20+ lines when using a parallel interface, we use the level shifting Seeeduino. Of course, there are many microcontrollers out there that natively run at a 3.3v logic level or have a switchable level and any of these controllers will work.
To change the Seeeduino’s level, find the VCC level switch and make sure to slide it to 3.3v.
Determining a Display’s Logic Level
If you’re not sure what logic level your display is, check the datasheet!
Navigate to the product page (crystalfontz.com/product/partnumber) and download the datasheet.
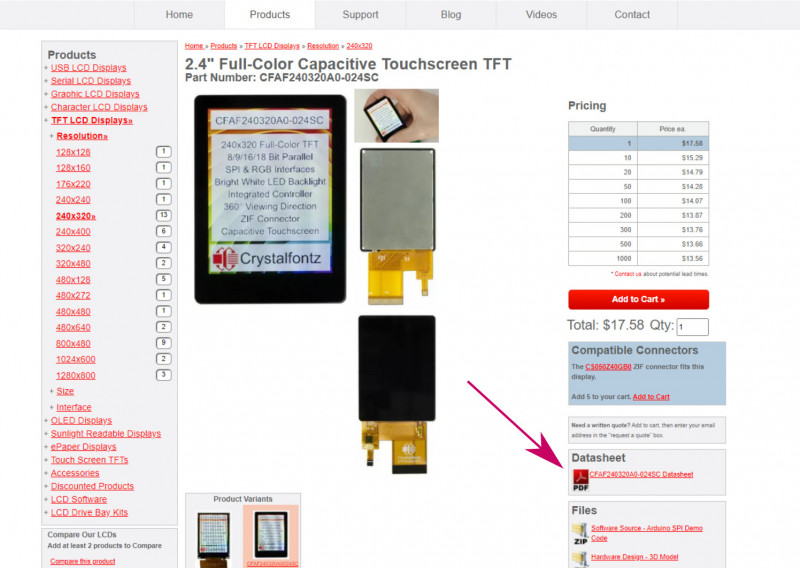
Scroll down to the Electrical Characteristics where the datasheet will list various voltages and components needed for the display.
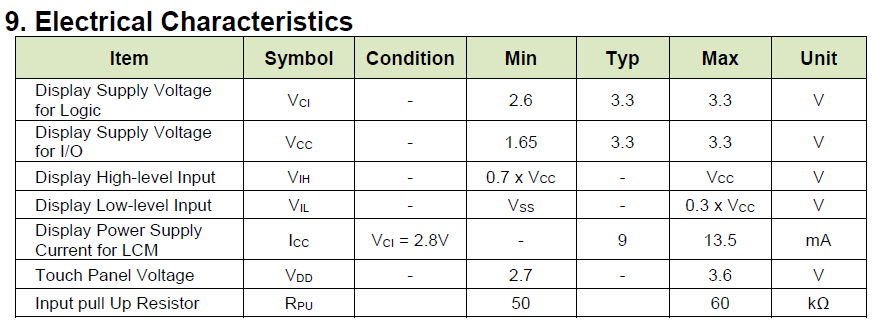
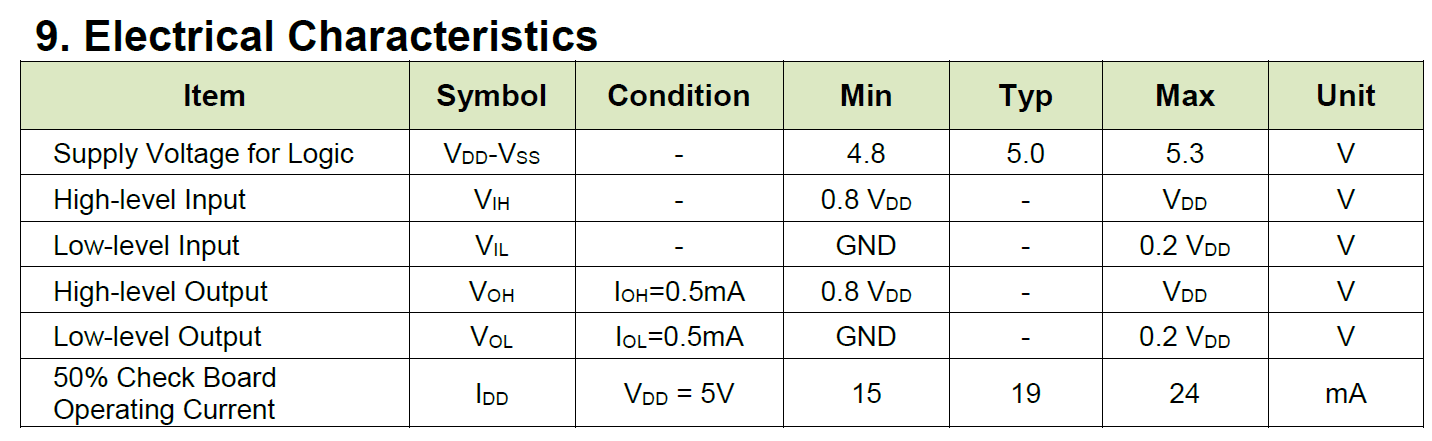
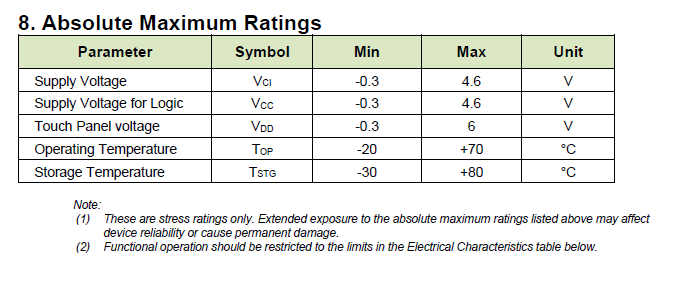
The datasheet will also list Absolute Maximum Ratings, showing what voltage level damage can immediately occur at. For the 3.3v display, we can see that connecting the logic to 5v can quickly cause damage to your display.
Check this page out for a list of displays that work great with an Arduino (shifted, of course) or Seeeduino.
TL;DR
Check what voltage your display can handle and make sure your microcontroller is compatible. Standard Arduino Unos are 5v logic while many displays are 3.3v logic.
Contact Us
If you have any questions, we can be reached at support@crystalfontz.com, we also provide chat and telephone support Monday through Friday during our open hours.
We love to hear about your projects! Find us around the web (YouTube, Facebook, Instagram, LinkedIn, Twitter, Forum) and let us know what you’re working on.

Kelsey is an engineer at Crystalfontz. She graduated from Gonzaga University with a BS in Electrical Engineering. Kelsey’s roles at Crystalfontz include product design, custom parts, customer support, documentation, and product demonstrations.
What our customers say about Kelsey:
“As a new user to the world of LCD electronics, Kelsey has been a Godsend in providing the hand-holding I needed to get my project up and running despite my own efforts at fouling things up! :-)” – Owen M
“Kelsey got me through changing code for a new LCD in only two short emails.” – Phillip V
“The agent that I talked with (Kelsey), is technically sound and she knows what she is doing. The support is what made my job easier to get started with the different display technologies. Thank you!” – Vatsal S