Transparent Display: How to Hack Together Your Own Transparent Display
DIY Transparent Display
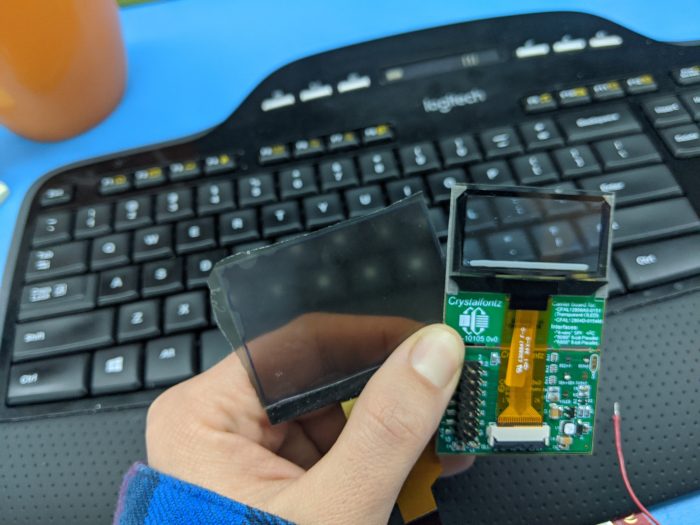
The transparent display we offer for sale (CFAL12856A0-0151) is an OLED (Organic Light Emitting Diode) display. OLED displays produce images by emitting light in the corresponding color. To produce black in a normal OLED, the pixels are simply turned off. With the transparent display, if the pixels are turned off, the display is transparent rather than black.
We’ve heard from a few customers requests for transparent displays with black graphics as well as requests for larger transparent displays. This guide will walk you through creating a transparent display out of a graphic LCD.
A few caveats before we get much farther. First, doing this will definitely void your warranty on the display. Second, the display we’ll create is significantly less transparent than a transparent OLED display as you can see in the above image with the hacked transparent display on the left and the transparent OLED on the right.
If these aren’t deal breakers for you, here’s how to make a DIY transparent display.
Supplies:
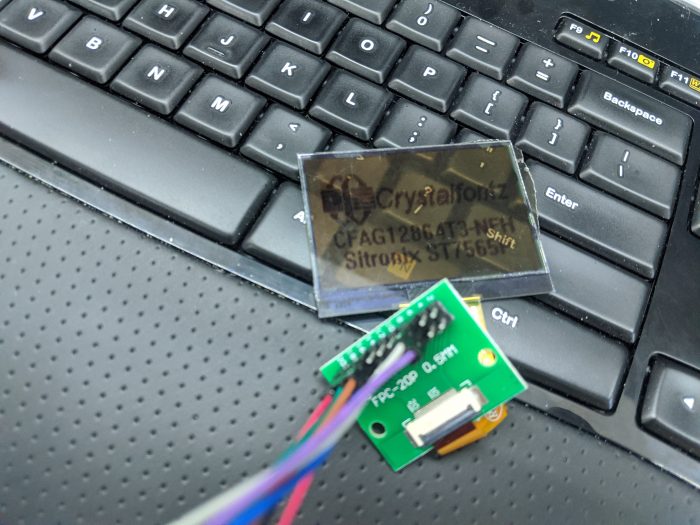
- A display to make transparent (we used the Graphic LCD CFAG12864U3-NFH)
- Polarizer significantly larger than your display
- x-acto knife
- Whatever you need to bring up your display:
- Breakout board
How to:
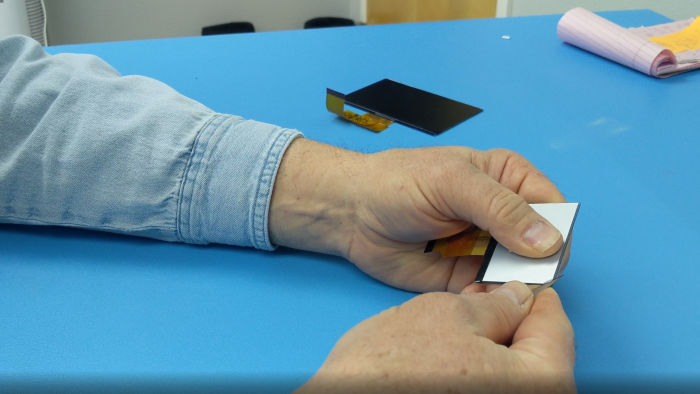
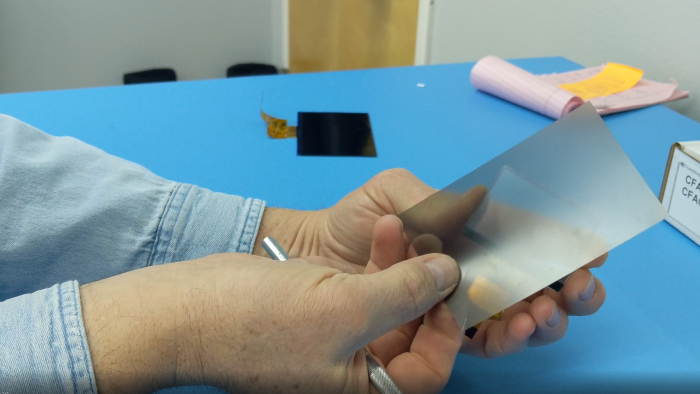
- Remove Back Polarizer
Using the x-acto knife, get between the back polarizer and the display and pull the transflective polarizer off of the display. Unlike our pictured engineer, you should wear some hand protection to keep your fingers safe.
- Clean Off the Display
Remove any dust that you don’t want to become part of your transparent display.
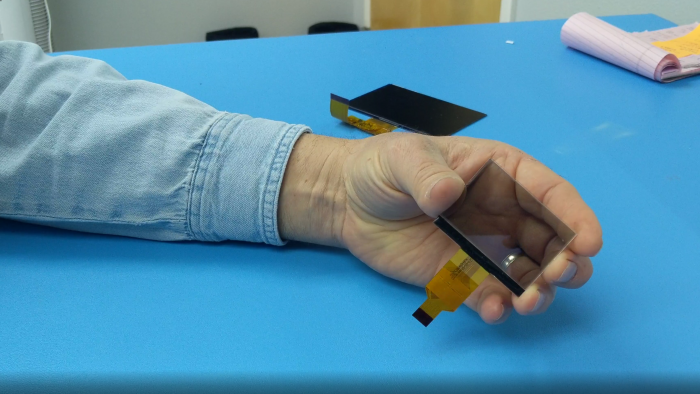
- Procure a Second Polarizer
We recycled a polarizer off a TFT from our scrap bin. The benefit to this is the polarizer already has adhesive. Plus recycling is good.
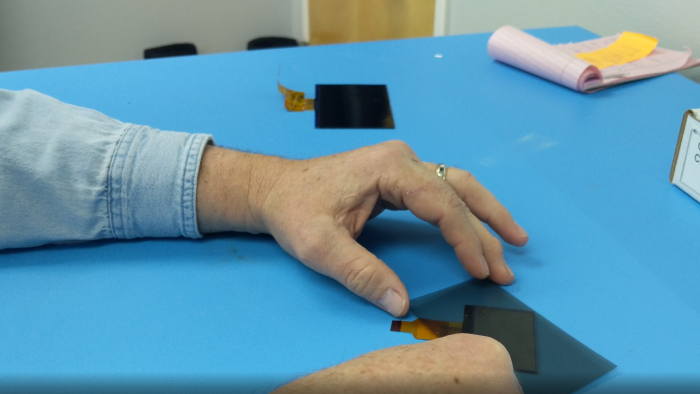
- Determine the Best Angle for the Polarizer
Rotate the display relative to the polarizer until you find the optimal transparency. This is why it’s important to use a larger polarizer so the polarizer can accommodate the display at any angle.
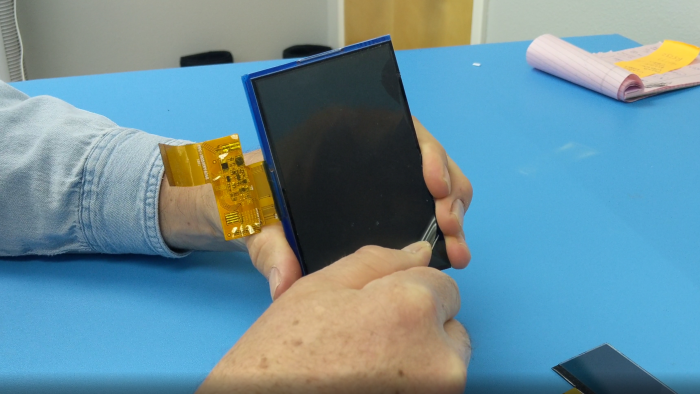
- Press the Polarizer Onto the Display
If you harvested a polarizer from an existing display it already has adhesive on it and you can simply carefully adhere it to the display. Take care while applying the polarizer or bubbles will form between the display and the polarizer.
- Cut Away the Excess Polarizer
Using the x-acto knife cut along the edge of the display. Again, using some safety precautions during this step is recommended.
When cutting the polarizer near the tail, be aware that there are traces connecting the tail to the display and cutting these traces will ruin your display.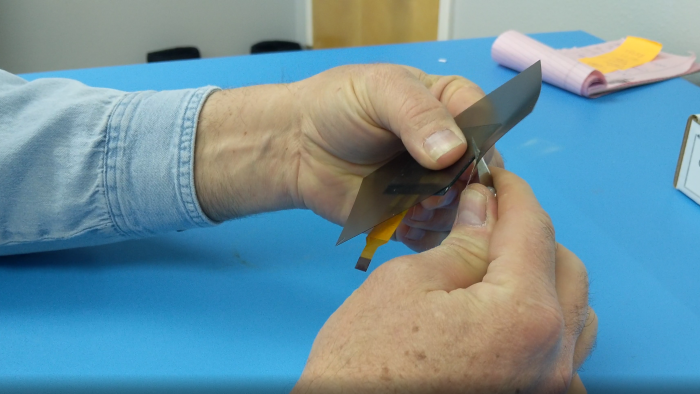
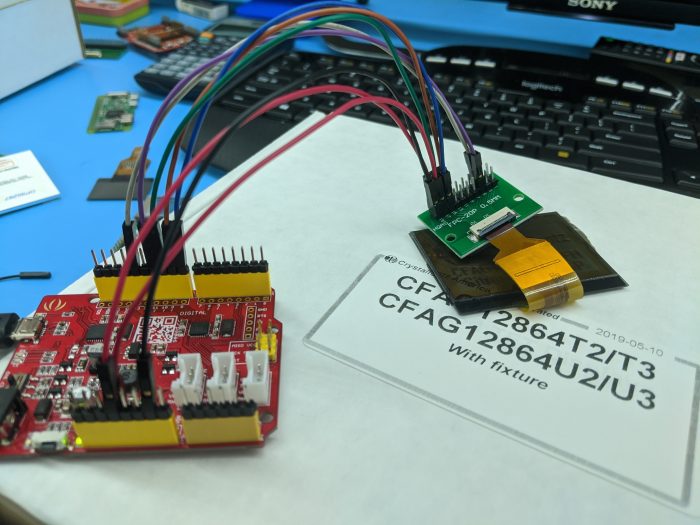
- Wire Up Your Display
Connect your display per its datasheet.
- Marvel at Your Newly Transparent Display’s Translucency
If you’d prefer to watch a video tutorial, check it out below:
Contact Us
If you have any questions, we can be reached at support@crystalfontz.com, we also provide chat and telephone support Monday through Friday during our open hours.
We love to hear about your projects! Find us around the web (YouTube, Facebook, Instagram, LinkedIn, Twitter, Forum) and let us know what you’re working on.

Kelsey is an engineer at Crystalfontz. She graduated from Gonzaga University with a BS in Electrical Engineering. Kelsey’s roles at Crystalfontz include product design, custom parts, customer support, documentation, and product demonstrations.
What our customers say about Kelsey:
“As a new user to the world of LCD electronics, Kelsey has been a Godsend in providing the hand-holding I needed to get my project up and running despite my own efforts at fouling things up! :-)” – Owen M
“Kelsey got me through changing code for a new LCD in only two short emails.” – Phillip V
“The agent that I talked with (Kelsey), is technically sound and she knows what she is doing. The support is what made my job easier to get started with the different display technologies. Thank you!” – Vatsal S